![SUST-Logo-Full_Black (2) (1).png]](https://knowledgebase.sustainment.tech/hs-fs/hubfs/SUST-Logo-Full_Black%20(2)%20(1).png?height=40&name=SUST-Logo-Full_Black%20(2)%20(1).png)
Add Files and Enable Revision Tracking in the Items Library
This guide shows how to attach files to an existing part in your Items library, choose which file appears as the thumbnail, and turn on revision tracking so changes to the part are recorded over time.
Before you begin
- Sign in to the Sustainment portal: portal.sustainment.tech
- Have the files for the part ready on your computer (for example, drawings, STEP models, and DXF files).
Step 1: Open the Items library
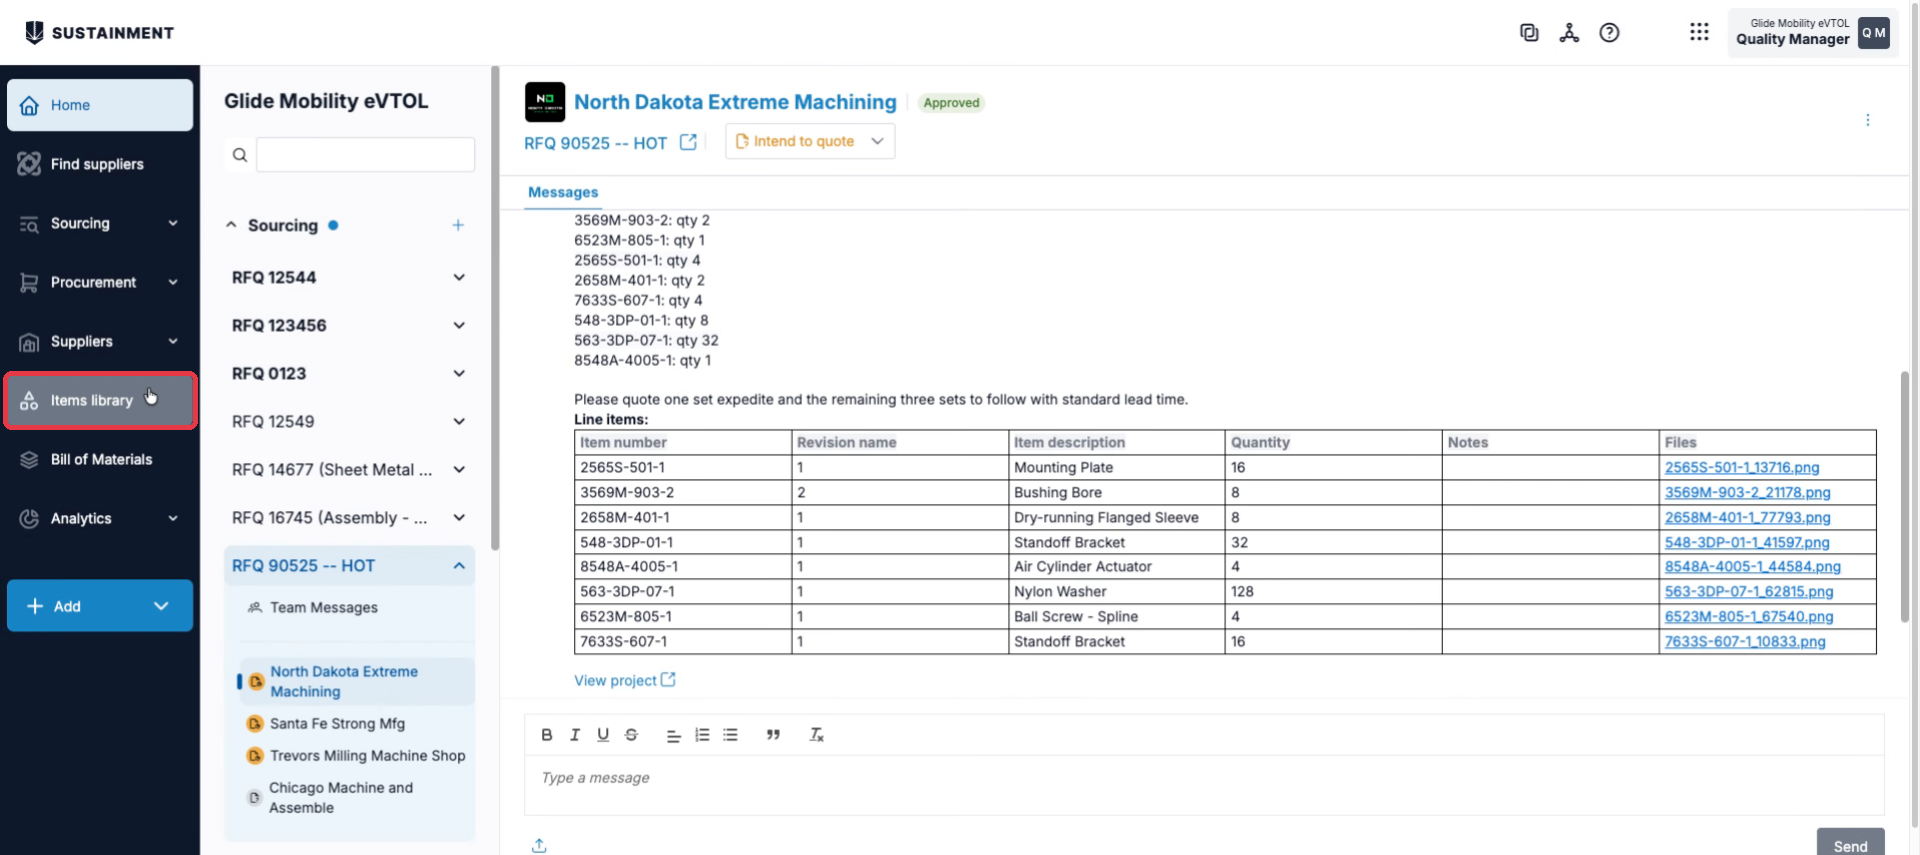
In the left-hand navigation, click Items library.
Step 2: Find the part
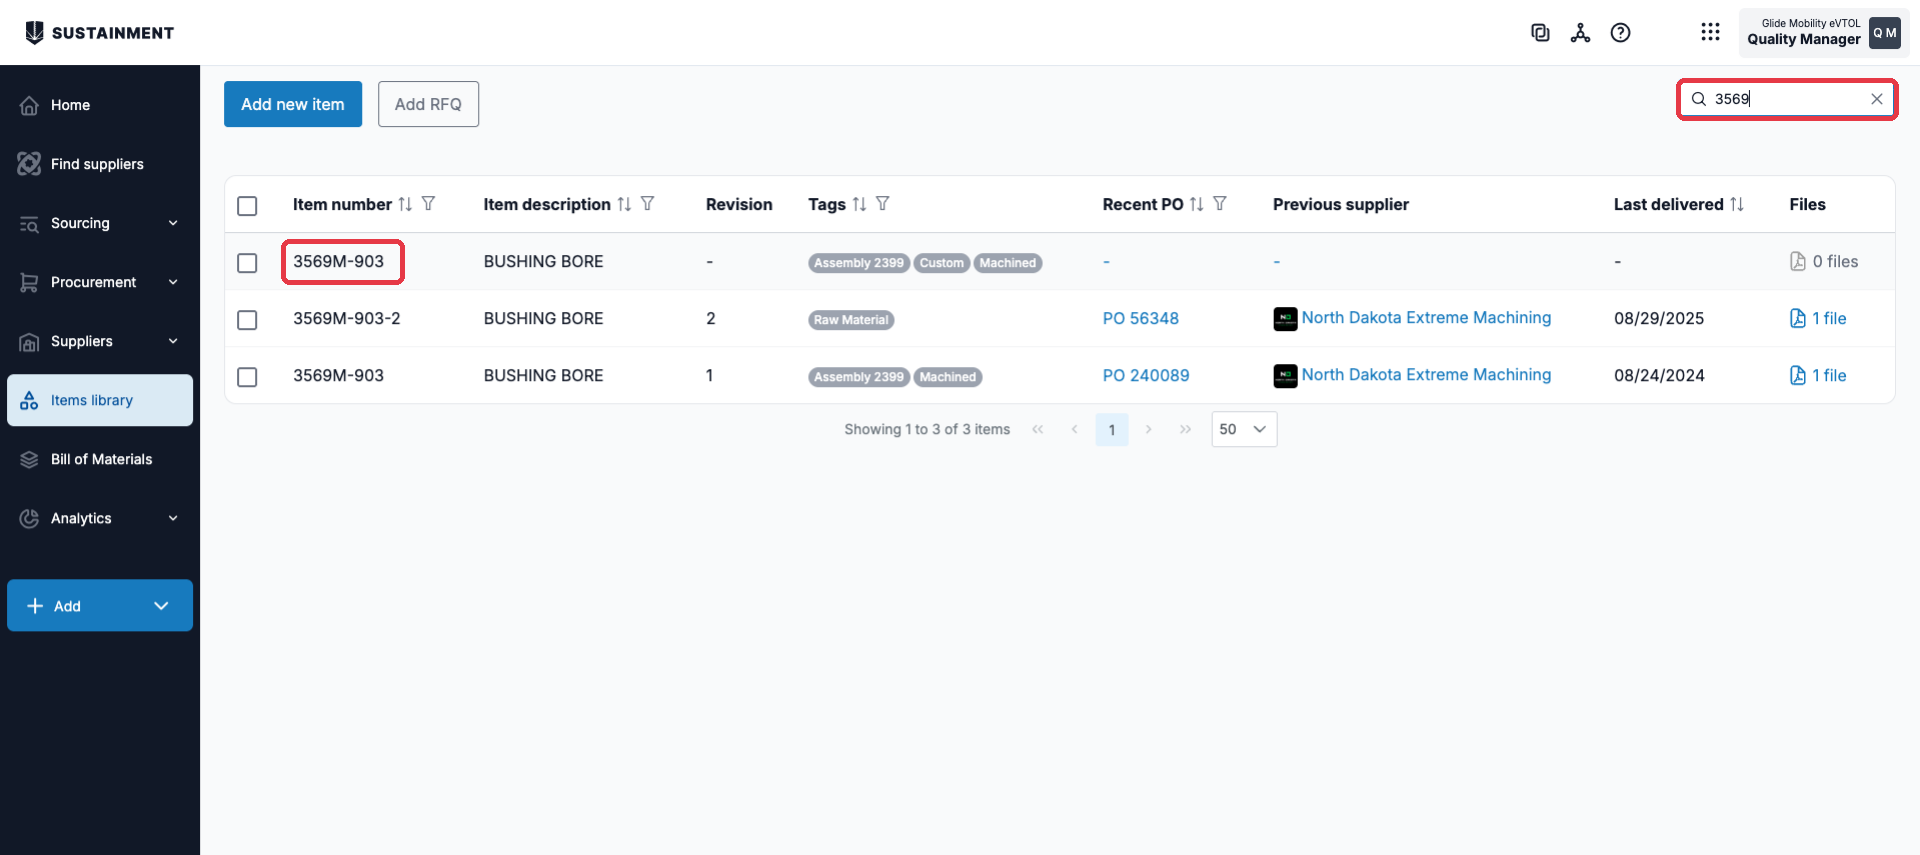
Use the search box in the top-right corner to search by item number or description, then click the item number to open the part record.
Step 3: Click Edit files
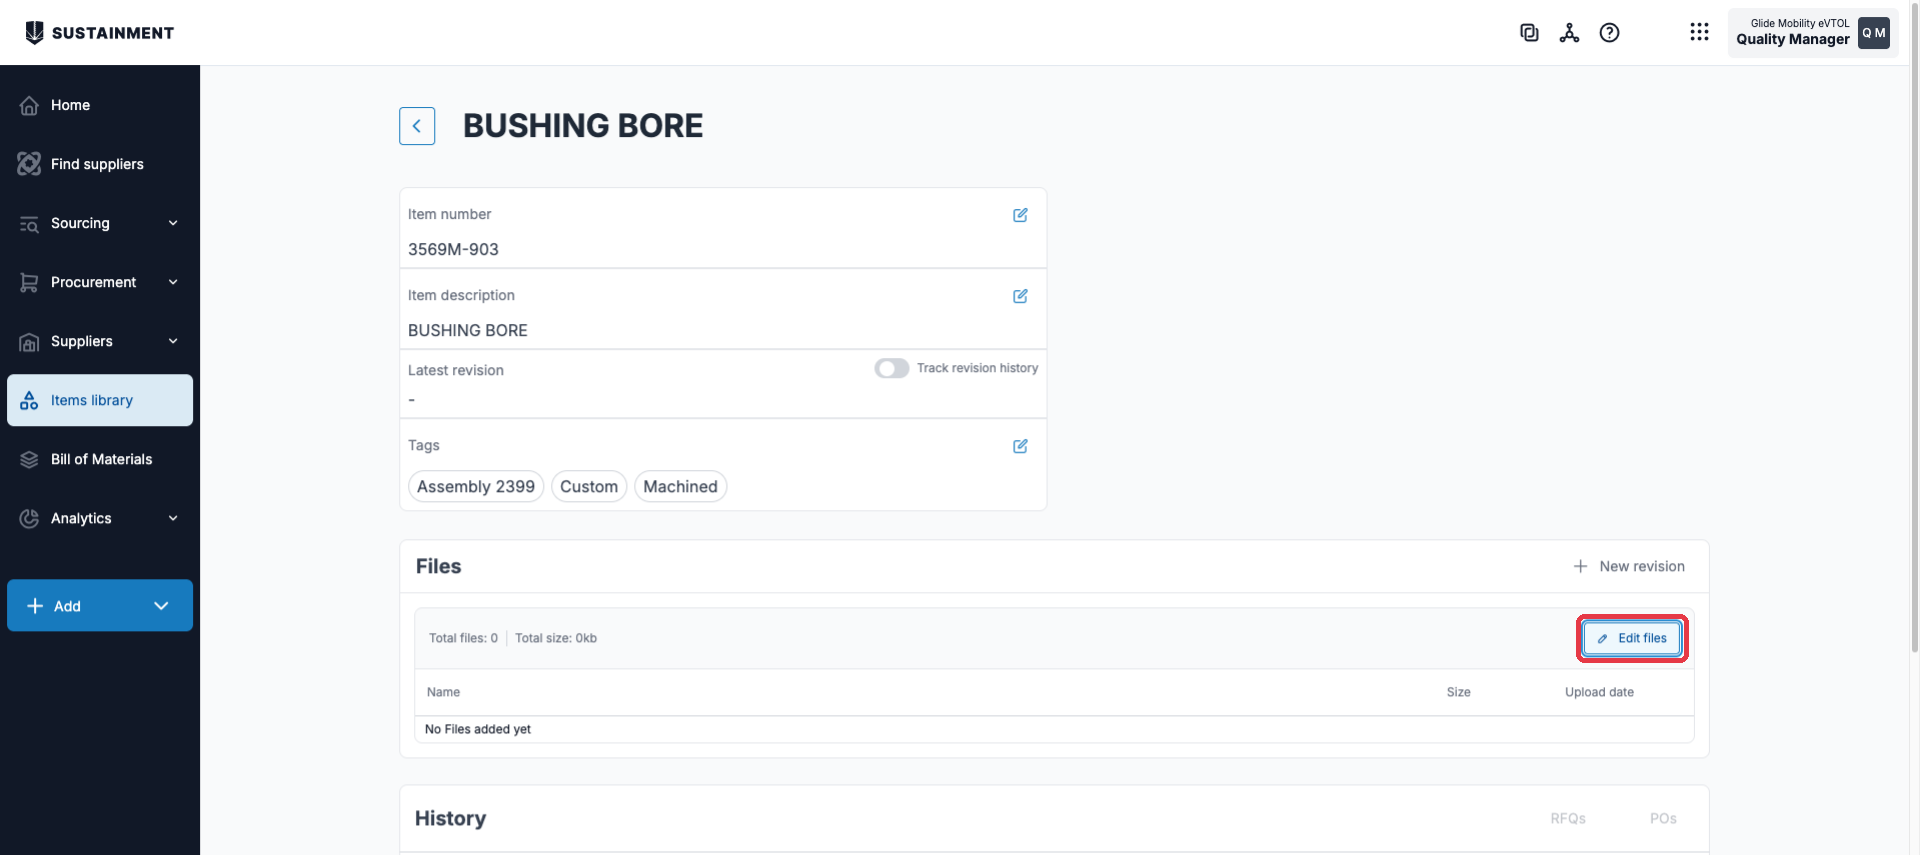
In the Files section of the part record, click Edit files.
Step 4: Upload your files
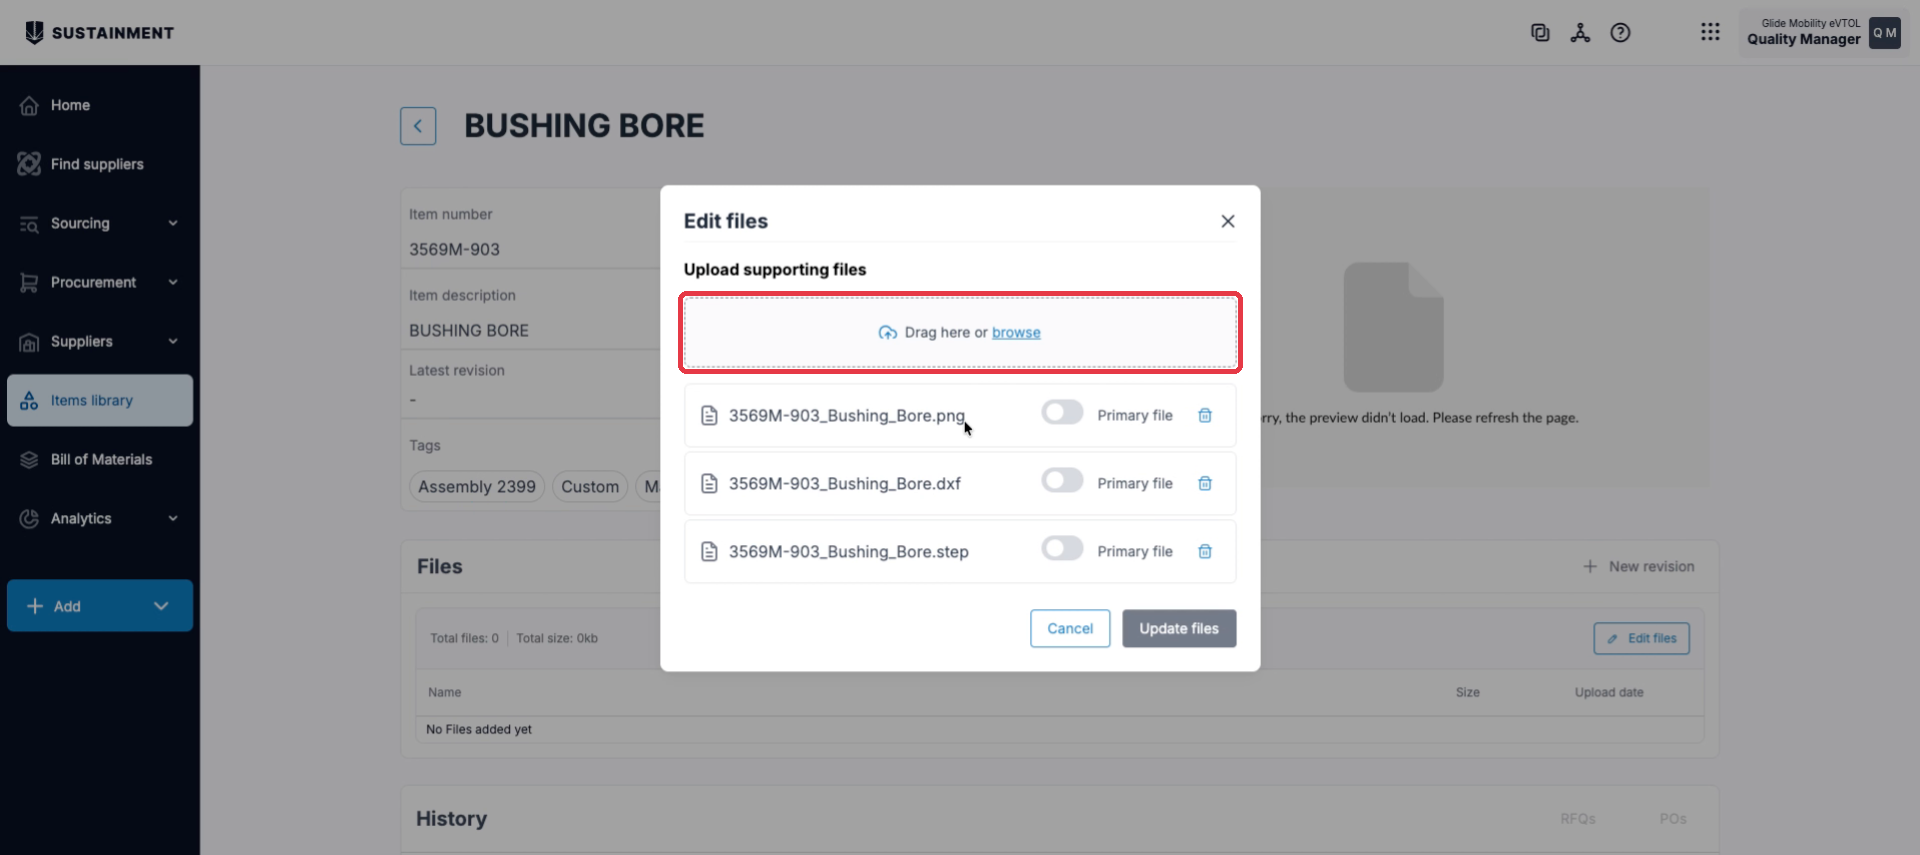
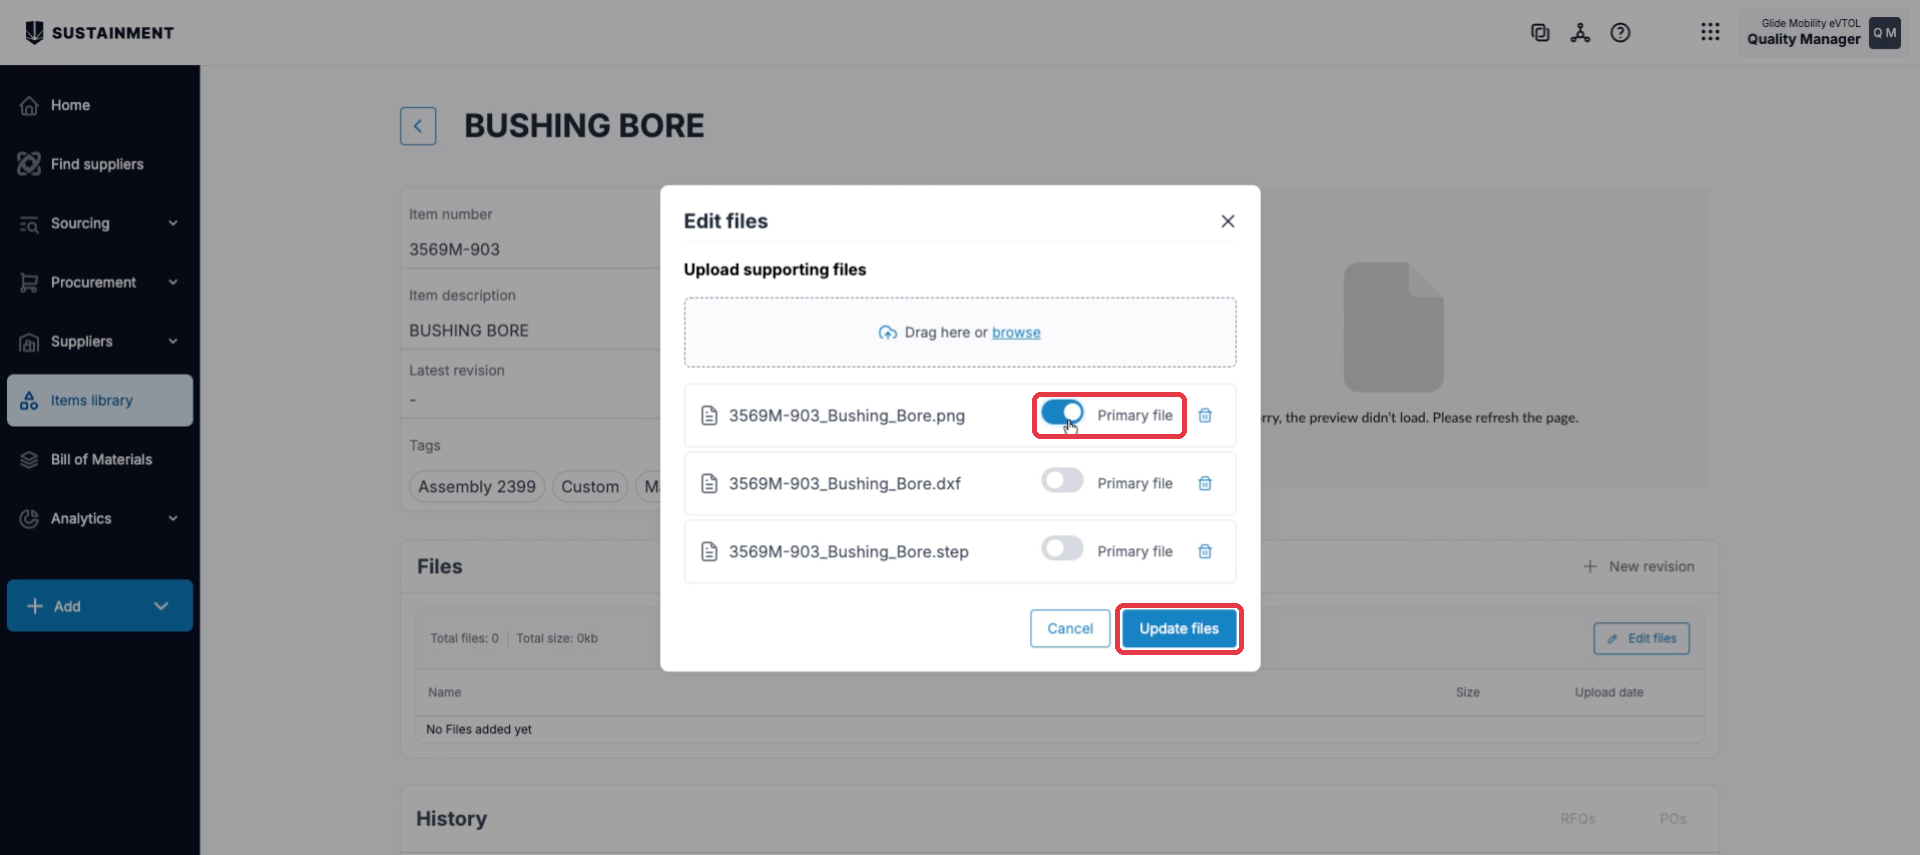
In the Edit files window, drag your files into the upload area or click browse to select them. Each file you add appears in the list below.
Step 5: Choose a primary file and save
Turn on the Primary file toggle next to the file you want shown as the part’s thumbnail preview, then click Update files.
Step 6: Turn on revision tracking
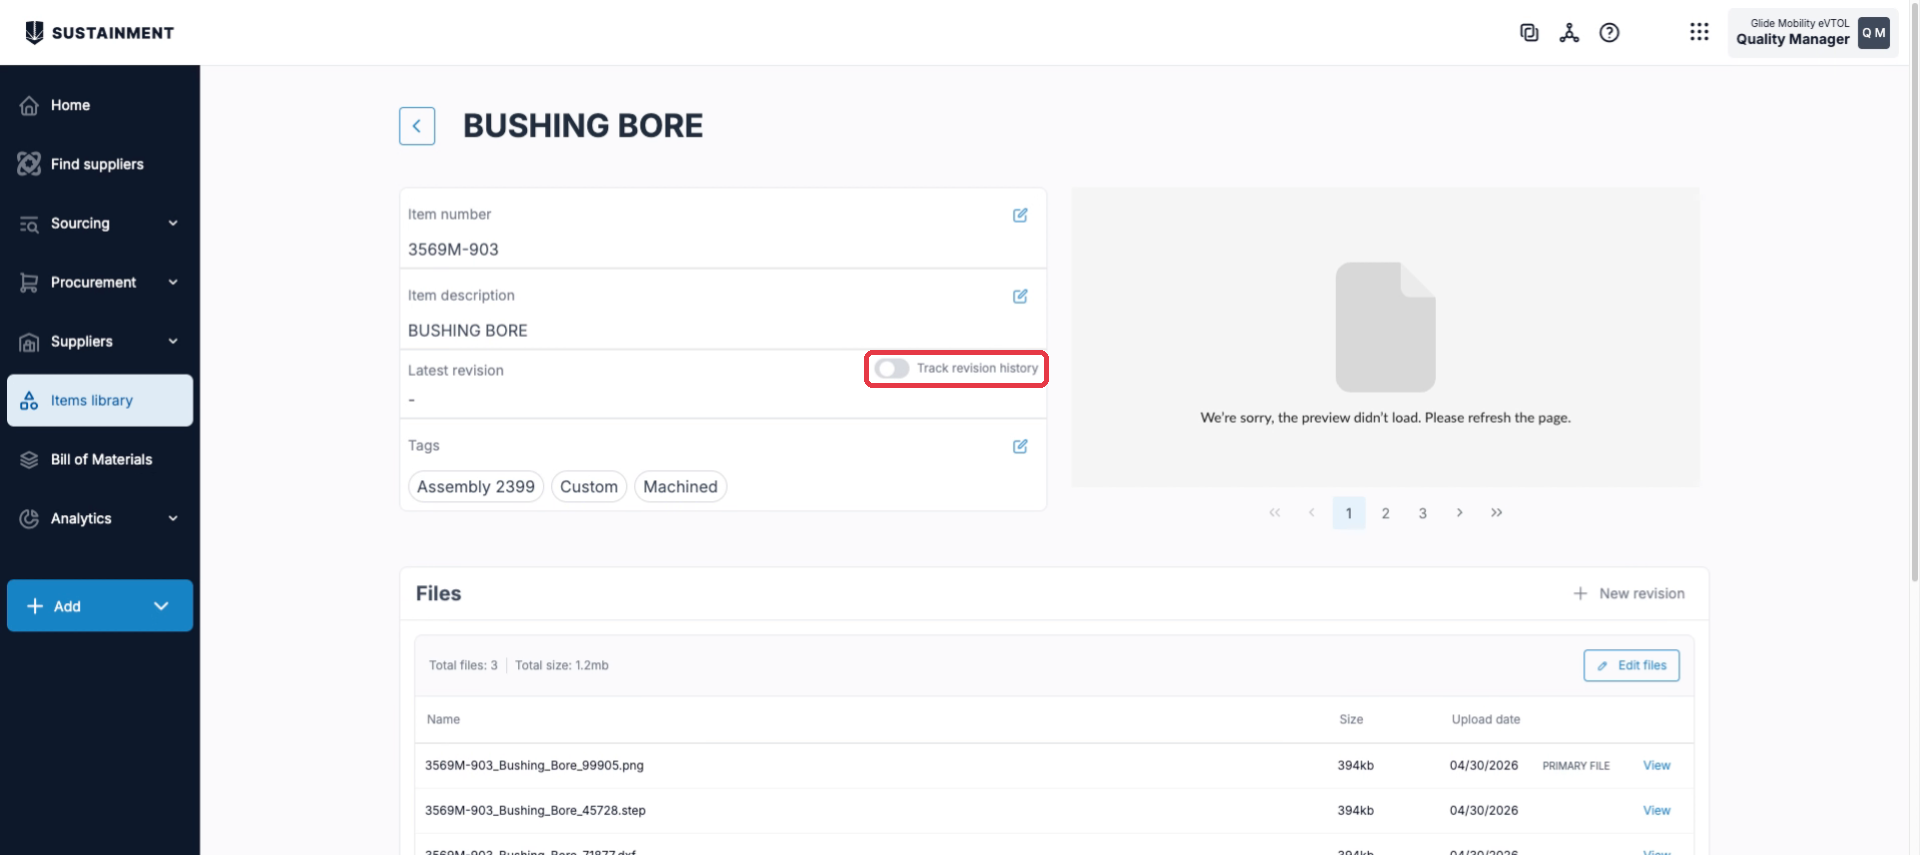
Back on the part record, switch on the Track revision history toggle next to Latest revision. Future file changes will now be recorded as new revisions.
Result
The files are attached to the part, the primary file appears as the thumbnail, and revision tracking is on so you can follow changes to the part over time.